
Navigating Pages and Shapes
When I am viewing or editing Visio diagrams, I often need to be able to select or find specific pages or shapes. I have previously described how to pan and zoom, so this article describes how to use the text, shape data or name to select and find pages and shapes.
Selecting shapes with the keyboard
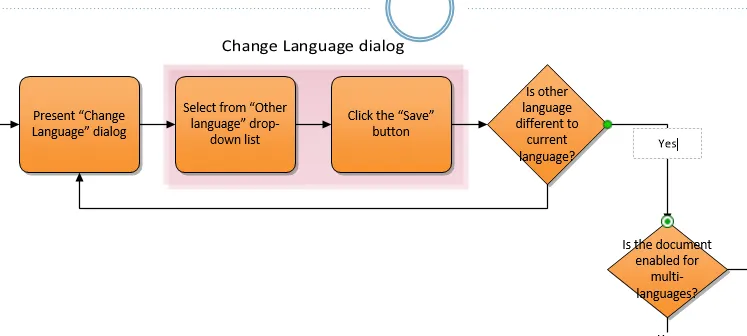
I can select shapes in Visio with the mouse, but sometimes it is more convenient to use the keyboard. For example, the Gateway shape is selected in the following flowchart, as indicated by a rectangular alignment box with shape handles. However, I now want to enter text on the adjacent connectors, so I use the TAB key to move forward to the desired connector shape, as can be seen with the dotted rectangle around the connector to the right of the selected Gateway shape.

Then I simply press the Enter key to select the dotted highlighted shape, and then type the desired text.
When I have typed the text, I press the ESC key, because pressing ENTER will actually start a new line within the text block.
I can use SHIFT+TAB keys to move backwards or back up the tab order. Note that the tab order is dictated by the order that the shapes were added to the page, and cannot be changed. If the last shape added to the page is reached, then the proto-selection dotted lines will move to the first shape in the page.
Using the Find dialog
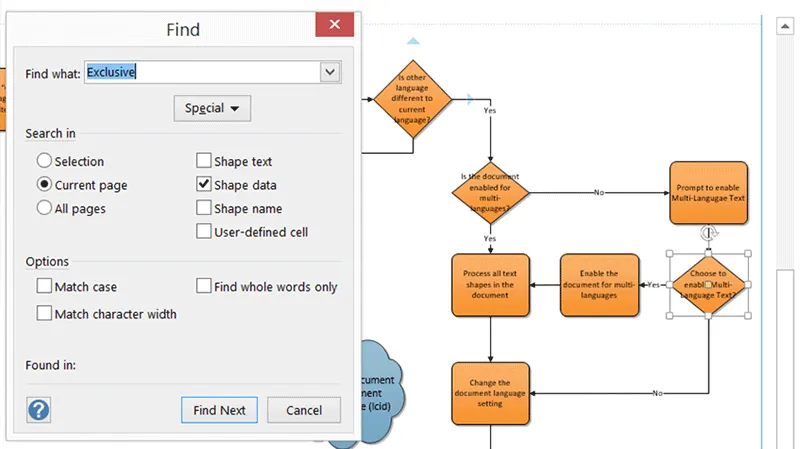
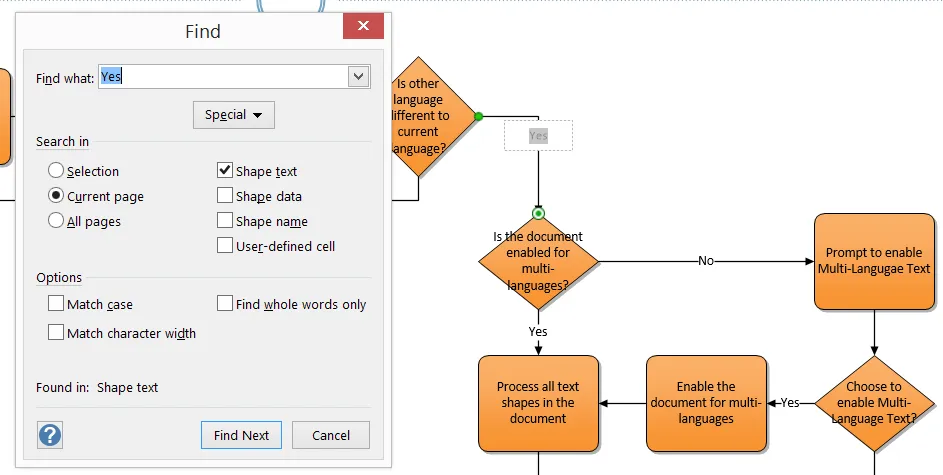
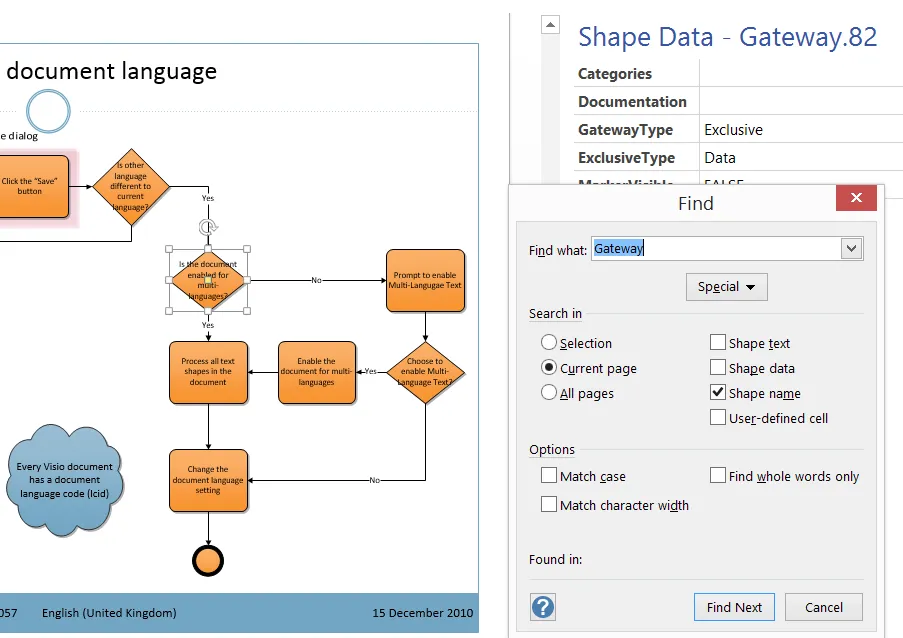
I sometimes need to find a shape with particular text in it, and I use the Find dialog (CTRL+F or HOME / Editing / Find / Find) to do this.
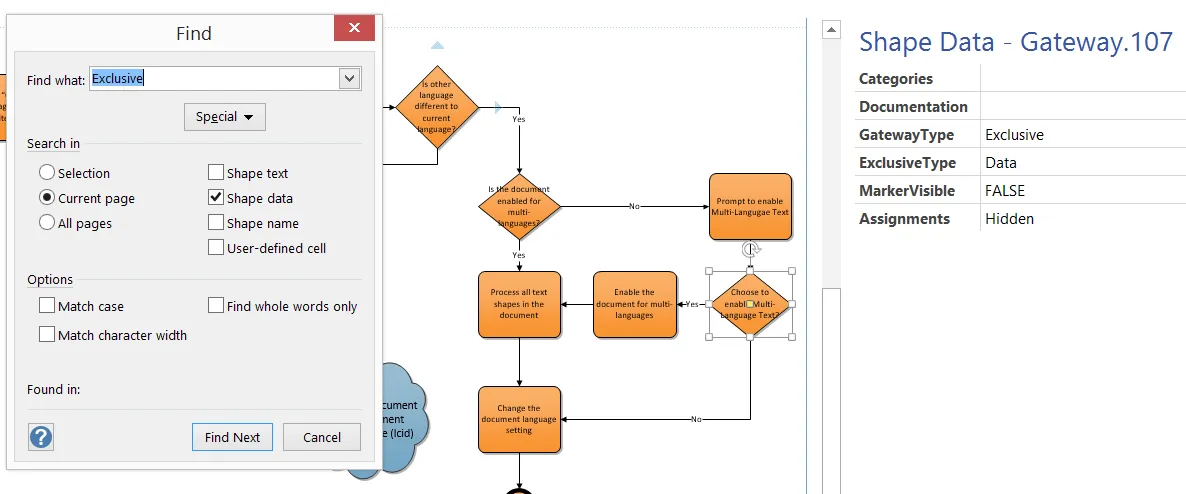
In this particular diagram type, each shape has some Shape Data, so I could use that to find shapes too, as in the following example where I have entered Exclusive for a value in the Shape Data.
Note that the Replace dialog, which is the second option on the Find drop-down button, only works with text, and not with Shape data or Shape names.
The header text of the Shape Data window displays the shape name, and, by default, each shape is named after the name of its master plus a unique number. Actually, the shape name does not have a trailing number if it is the first time the master is used in the page. Therefore, I can often use the Find dialog to search by Shape name.
Custom naming of shapes
However, a shape could have a custom name, that does not start with the name of the master that it is an instance of, and, if I just draw a shape, rather than drag and drop from a stencil, then it will not be an instance of a master shape, and its name will start with Sheet. followed by a unique number.
The name of a Visio shape must be unique in the page, and anyone can re-name a shape, if desired. This can be done with the Shape Name dialog or the Drawing Explorer window. Both of these commands are on the DEVELOPER tab, which may need to be revealed.
.png)
The Drawing Explorer window can also be used to change the active page, as well as selecting a shape. In the above screenshot, I can see that there are a lot of Dynamic Connector shapes, and all but one (the first one) has a number suffix. I can also see three Gateway shapes, and I can rename them by using the Shape Name dialog or by selecting the shape name in the Drawing Explorer window, then pressing F2 to go into Text Edit mode. I can then type in a new name which means more to me when searching for it at a later time.
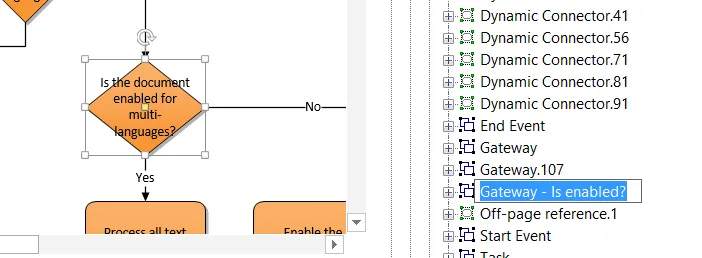
Note that some Visio applications will automatically create these new names for you.
Using the Status Bar, Keys and Mouse
In addition to the Drawing Explorer window, there are a series of items in the status bar along the bottom of the Visio interface that can assist in navigating a Visio document.
In the bottom left corner, clicking on the PAGE X OF Y text will open a dialog to allow you to select a page to activate, whilst the All page selector button at the far right of the page tabs pops up a menu to select a page.
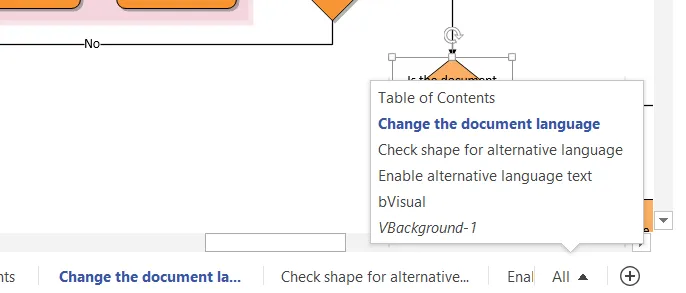
Note that the background pages are shown in italics because I do not normally need to activate them.
Revealing the Developer Tab
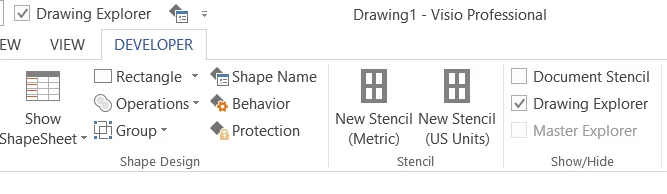
By default, Visio hides the DEVELOPER tab in the ribbon, because most users do not require the extra buttons. However, this tab does include two useful buttons, Shape Name and Drawing Explorer, for aiding navigation.
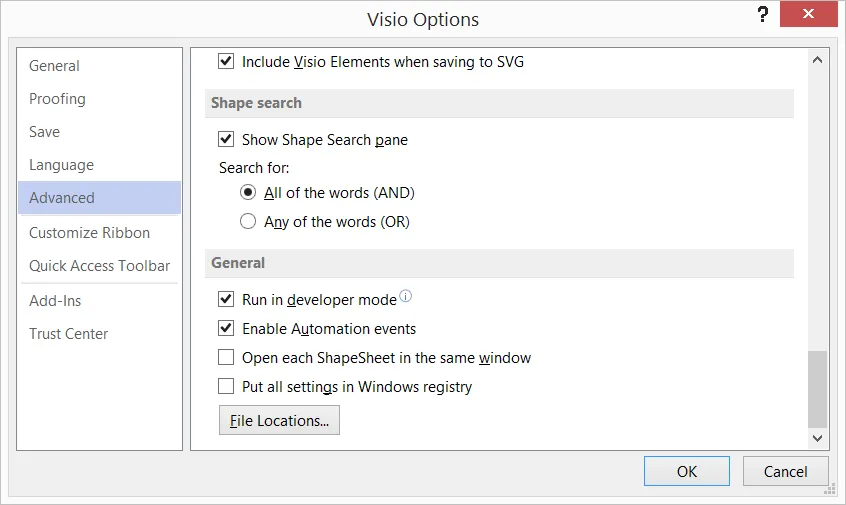
Part of the DEVELOPER tab is displayed in the following screenshot, and notice the Shape Design \ Shape Name button, and the Show/Hide \ Drawing Explorer checkbox.
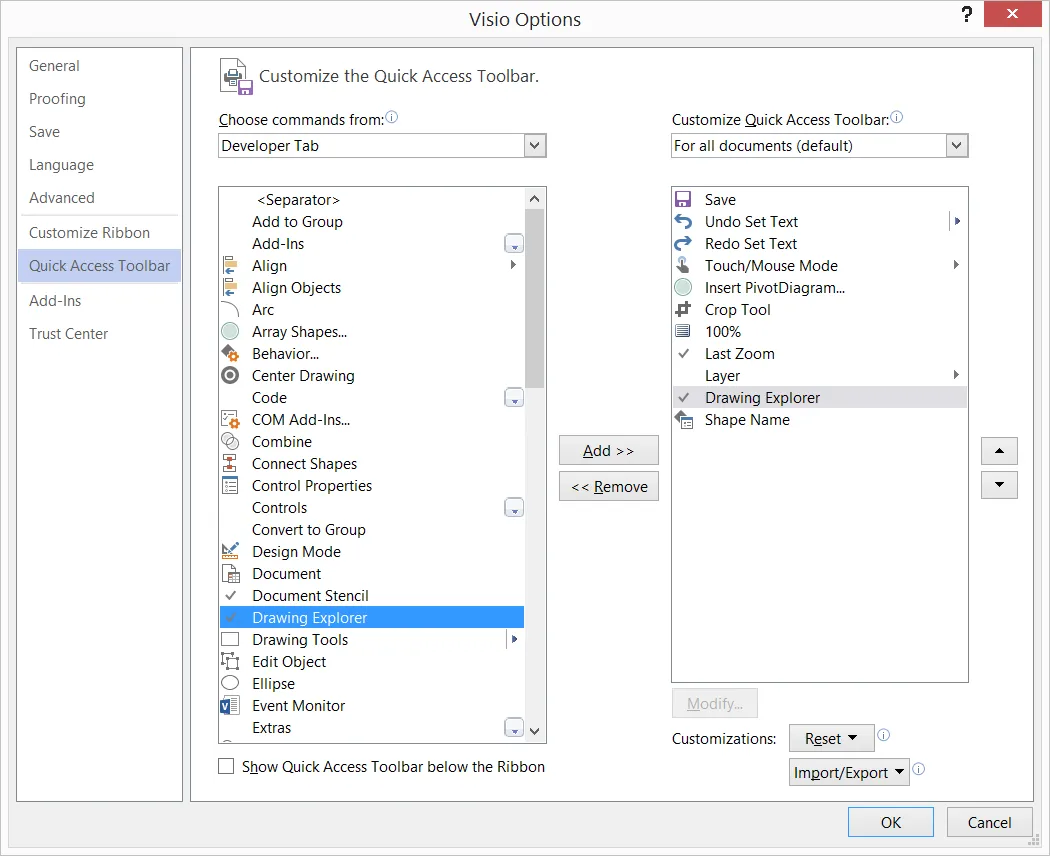
An alternative to displaying all of the DEVELOPER tab is to just add the Drawing Explorer and Shape Name commands to a custom tab group, or to the Quick Access Toolbar, as below.
Summary
I have explained some useful techniques for selecting and finding shapes in Visio diagrams. I have also described how I can re-name a shape so that I can find it more easily. This means that I can return to my Visio diagrams and find shapes more quickly, if I need to view them or edit them, thus increasing my productivity.

.webp)