
I have worked within many organizations where Visio documents and diagrams need to be well presented, or otherwise they will be ignored. One of the ways to provide a consistent professional look is to use borders, titles and backgrounds. In this article, I discuss the built-in ones, and show how custom ones can be created.
The Built-in Visio Backgrounds
I can easily insert a background shape from the DESIGN \ Backgrounds ribbon drop-down button in the Visio menu.

In fact, when I do drop one of these background shapes, say the one called Flow, down onto my page, then a new page, called VBackground-1 or similar, is automatically created, and the shape is moved onto this page. This new page has a page type of Background and it is automatically associated with the Foreground page that I initially dropped the shape onto.
Note that the first option is No Background which appears to remove any existing background shape.
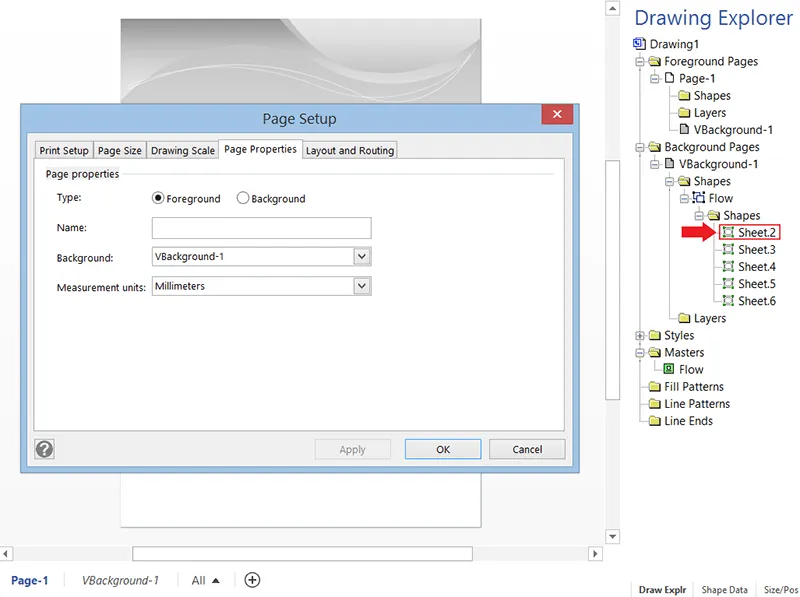
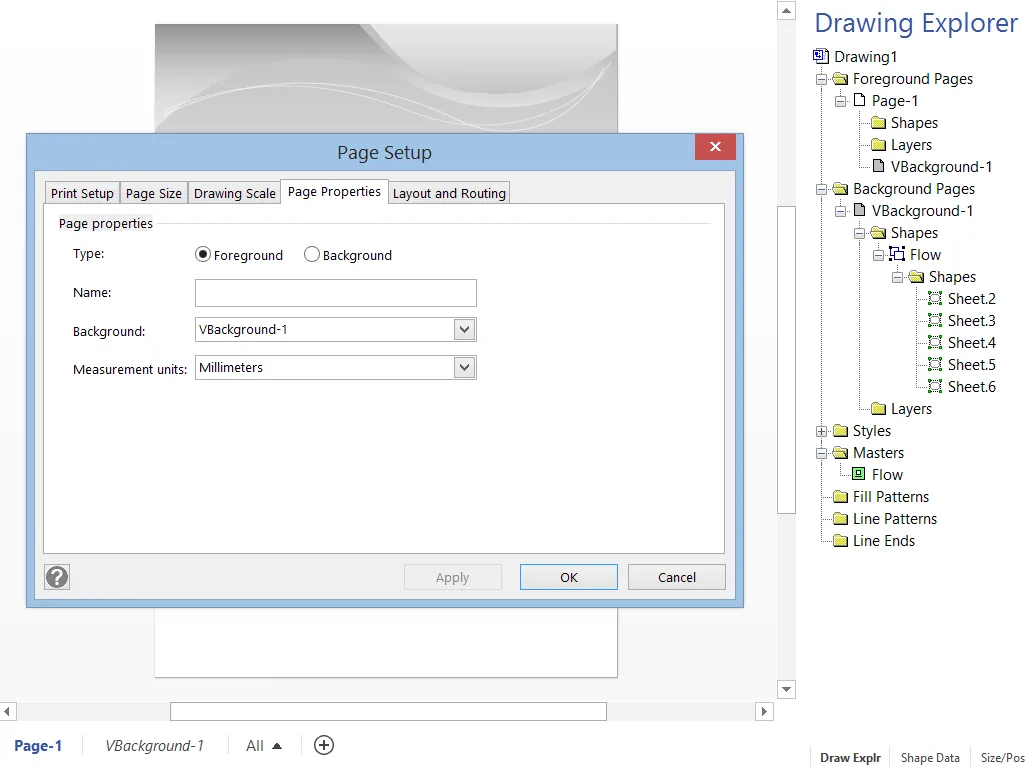
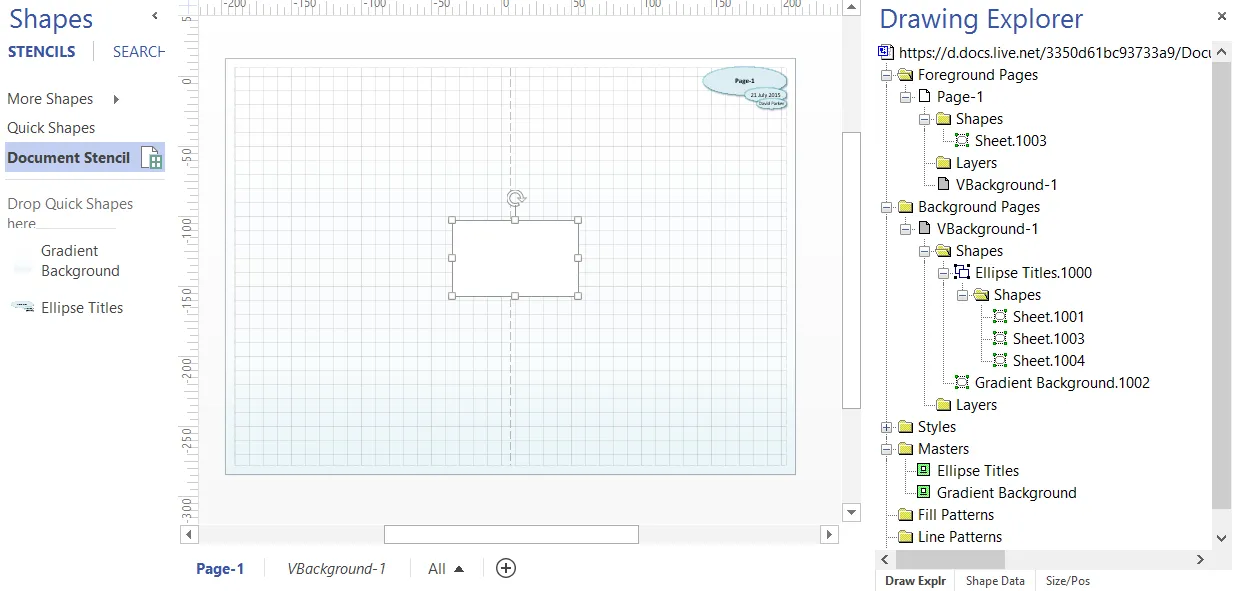
In the following screenshot, I have opened the Drawing Explorer window to show that the Flow shape is on the VBackground-1 page, and that it has several sub-shapes within it.
When I examine the ShapeSheet of the top group shape inside the Flow master, then I can see why the shape behaves like it does.
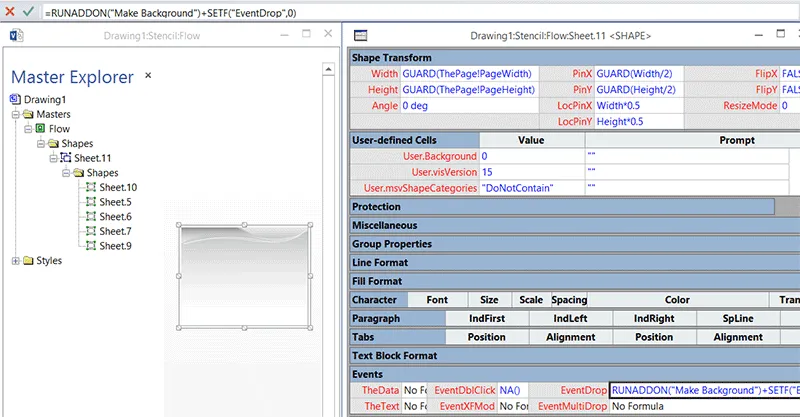
First, the Width and Height formulas fix them to the width and height of the page, and the PinX and PinY formulas ensure that it is centered on the page.
The User.Background cell is required with the value 0 for the “Make Background” add-on in the EventDrop formula to function properly and understand that this is a simple background shape. Any subsequent calls to this Microsoft provided add-on will replace the existing background shape, rather than add a new one.
CellFormulaWidth=GUARD(ThePage!PageWidth)Height=GUARD(ThePage!PageHeight)PinX=GUARD(Width/2)PinY=GUARD(Height/2)User.Background0User.msvShapeCategories="DoNotContain”EventDrop=RUNADDON(“Make Background”)+SETF(“EventDrop”,0)
The second part (SETF(…)) of the EventDrop formula actually removes the formula from the shape when it has been dropped, so that it cannot be run a second time.
The User.msvShapeCategories formula is set to “DoNotContain” in-case the shape is accidentally on top of a container shape.
The Built-in Visio Borders & Titles
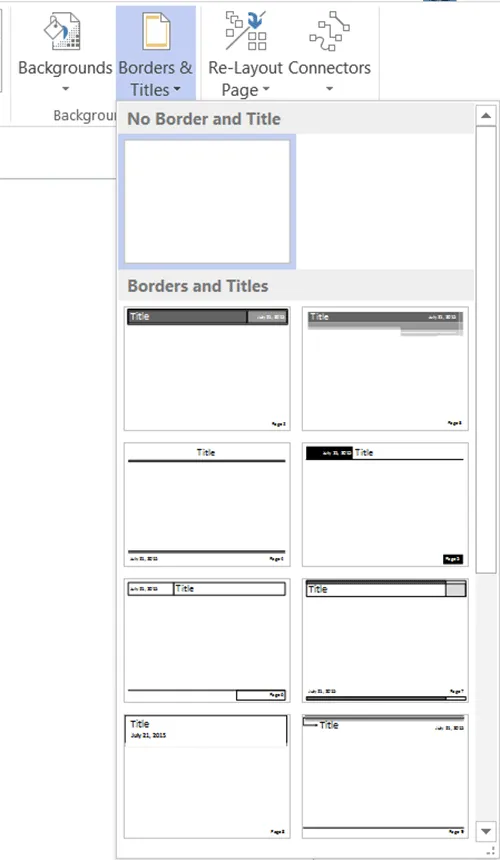
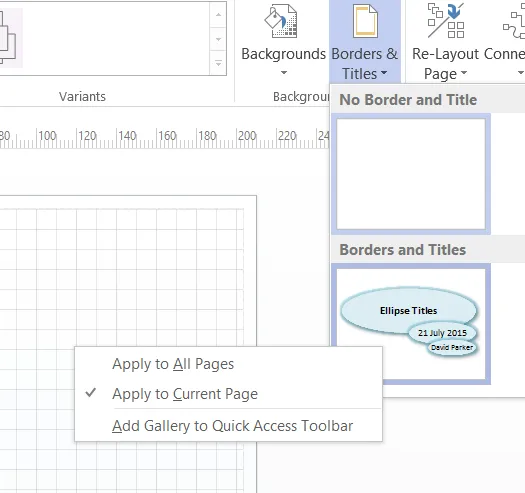
Borders and titles can be inserted in a similar manner to the background shapes, from Visio's Borders & Titles drop-down gallery.
Just like the Background shapes, the border shape, called Tiles in this example, is automatically moved to a new VBackground-1 page, or it is added to an existing background page.
Note that the first option is No Border and Title which appear to remove any existing border and title shape.
An exploration of the Tiles master reveals how it works. In fact, I noticed for the first time that this shape has a right-mouse menu option to hide or show the footer shape, which displays the page number.

The key formulas for the border and title shape ensure that the shape is sized to the page minus the margins, and the User.Background formula is set to 2.
CellFormulaWidth=GUARD(ThePage!PageWidth-ThePage!PageLeftMargin*ThePage!DrawingScale/ThePage!PageScale-ThePage!PageRightMargin*ThePage!DrawingScale/ThePage!PageScale)Height=GUARD(ThePage!PageHeight-ThePage!PageTopMargin*ThePage!DrawingScale/ThePage!PageScale-ThePage!PageBottomMargin*ThePage!DrawingScale/ThePage!PageScale)PinX=GUARD(Width/2+ThePage!PageLeftMargin*ThePage!DrawingScale/ThePage!PageScale)PinY=GUARD(Height/2+ThePage!PageBottomMargin*ThePage!DrawingScale/ThePage!PageScale)User.Background2User.msvShapeCatgories="DoNotContain"User.AntiScale=IF(AND(User.Scale>0.125,User.Scale<8),1,User.Scale)User.Scale=ThePage!DrawingScale/ThePage!PageScaleEventDrop=RUNADDON("Make Background")
The User.AntiScale and User.Scale formulas are actually used by the sub shapes to ensure that fonts and line thicknesses look good at different scales.
N.B. Historically Visio fonts and line thicknesses have behaved best when they are within a factor of eight of their original scale, hence the formula in User.AntiScale that checks that the scale is within this range.
Inserting document properties
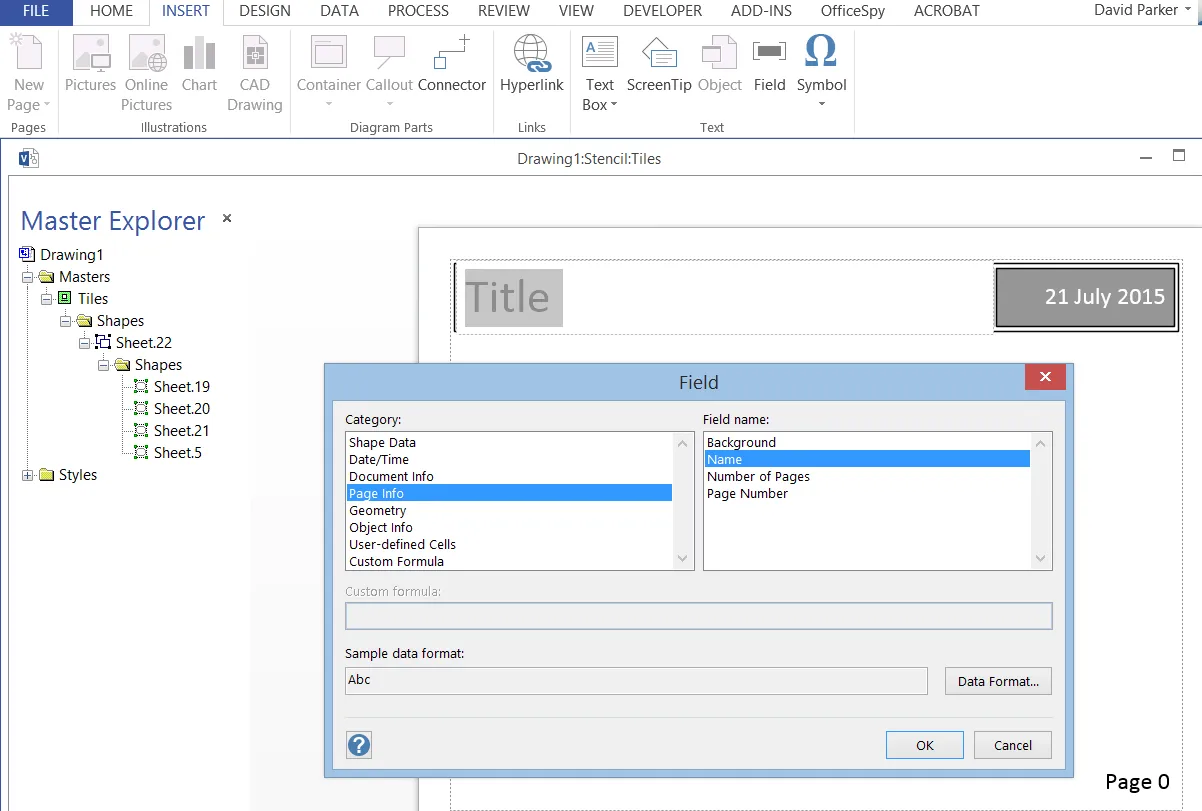
I often modify the text on my border and title shapes to display document, page or date\time values automatically, by using the INSERT \ Field dialog.
Inserting document timestamps
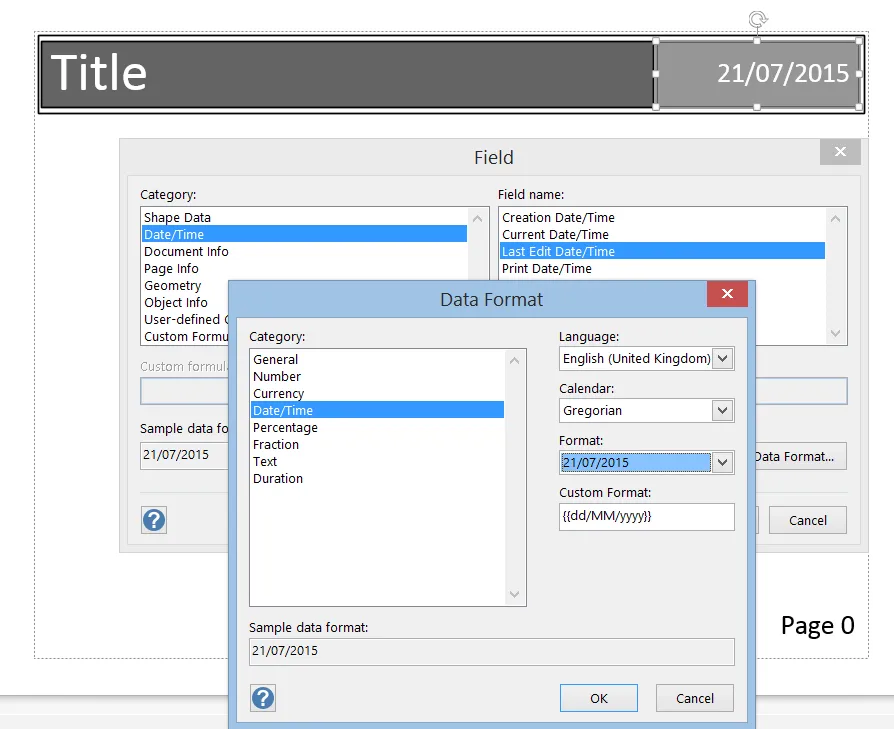
I am a great believer in displaying a date\timestamp on Visio documents because it can be important to know if the printed document is current or not.
When I insert date\time values, then I usually ensure they are formatted in the manner that my audience requires. I remember having to change all dates to US format, i.e. month first, for a Swiss bank in London because the reports were being viewed by an American.
Of course, other data types can be formatted too.
Making Custom Masters
I decided that my custom background shape, called Gradient Background, should have 80% transparency. This means that I will still be able to see the grid lines and page breaks on the screen, and it will save in those ink costs!
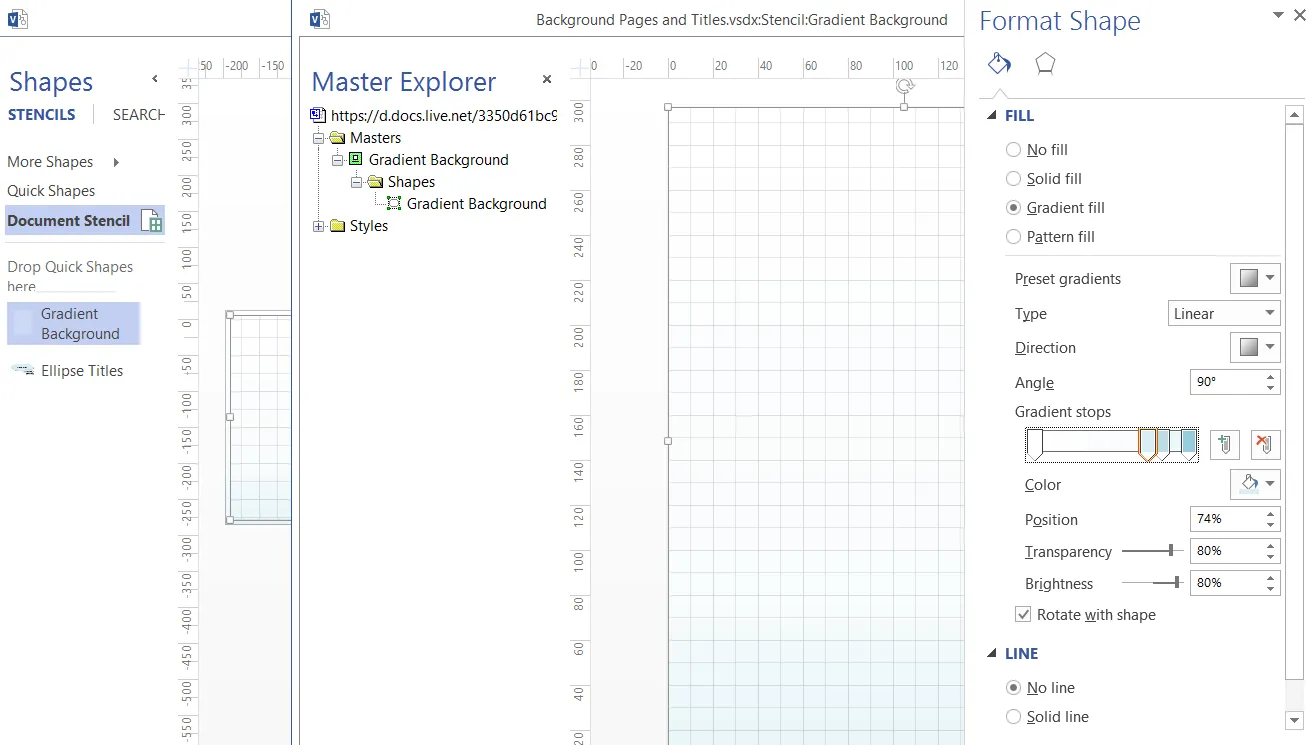
Basically, I just created a formatted rectangle, and applied the cell formulas as described above for the built-in Flow master shape.
Similarly, I created a new master called Ellipse Titles, and applied the formulas from the top group shape of the built-in Tiles master. I converted my basic rectangle to a group with no line or fill, and inserted sub shapes into this group shape.
N.B. I always add the Edit Object command to my ribbon using Customize Ribbon, because this enables me to open a group shape up. I think Microsoft hid this command because some users would accidentally open a group shape, and then mess it up!
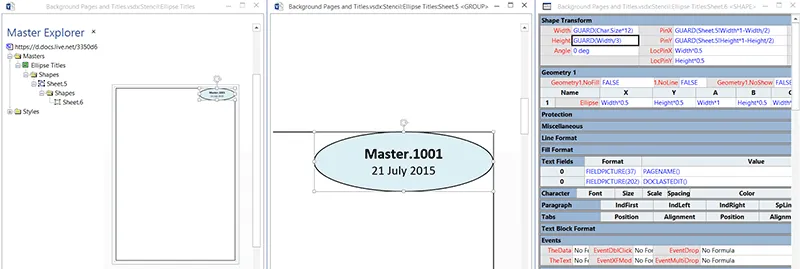
It is worth mentioning that I often fix the size to the font size, and position relative to an edge of the parent group shape. In this example, the Width of the ellipse is a multiple of the font size, and its PinX and PinY formulas are relative to the top edge and right edge of the parent shape.
CellFormulaWidth=GUARD(Char.Size*12)Height=GUARD(Width/3)PinX=GUARD(Sheet.5!Width*1-Width/2)PinY=GUARD(Sheet.5!Height*1-Height/2)
After I created another couple of ellipses, and inserted formulas similar to above, I could then drag and drop onto the page. The PinX/PinY formulas ensure that the ellipses are always in the top right corner, even when the page is automatically or manually resized.
Making Custom Stencils
Although I have shown these custom masters in a document stencil, there is no reason why they cannot be added to a general stencil for use on any document.
You can even get the Visio interface to display these custom backgrounds, and borders and titles in the drop-down gallery, rather than the Microsoft ones. All you need to do is save the stencils with the special names _BCKGRND.vssx and _BORDERS.vssx into the My Shapes folder in My Documents.

In this example, I also copied the None masters from the original Background and Borders and Titles galley on to the respective custom stencils. These masters have a slightly different formula in the EventDrop cell, =RUNADDONWARGS("Make Background","/R")+SETF("EventDrop",0). Also, the User.Background cells are set to 1 and 3 respectively.
Now, when I re-open Visio, I no longer see the built-in galleries because they have been replaced with the custom galleries from my stencils.
Note that the leading underscore in the stencil names means that they will get hidden from the Visio More Shapes \ My Shapes menu.
Summary
In this article, I have described how the built-in Visio background, borders and title shapes work, so that custom ones can be created for any organization. I have always found that company personalized documents are more likely to be accepted, and their bona fides are more clearly understood.
Free Visio Stencils!
For Free Visio Stencils, posters and more, check out our fantastic starter packs that you can use as a foundation for your TOGAF, BPMN and Lean initiatives! Get my free Visio stencils!

.png)