

How to Use Layers in Visio
Visio users often overlook the usefulness of layers in diagrams, and sometimes even copy parts of diagrams to add more detail when a simple understanding of them can control their visibility, print-ability, color and selection. This article explains how Visio layers can be used to my advantage.
What is a Layer?
First of all, a layer does not control whether one shape is displayed on top or below another shape … we call that the Z-Order, and that is done with Send to Back; Send Backward; Bring to Front or Bring Forward.
Here are a few facts about layers in Visio:
- A Visio shape does not have to be assigned to any layer, but can be assigned to one or more layers.
- Layers are created in a page by creating them using the Layer Properties dialog, or by adding shapes that already have a layer (or layers) assigned.
- Sub-shapes with a Visio group shape can each be assigned to different layers.
- Layers cannot control the visibility of Shape Data rows.
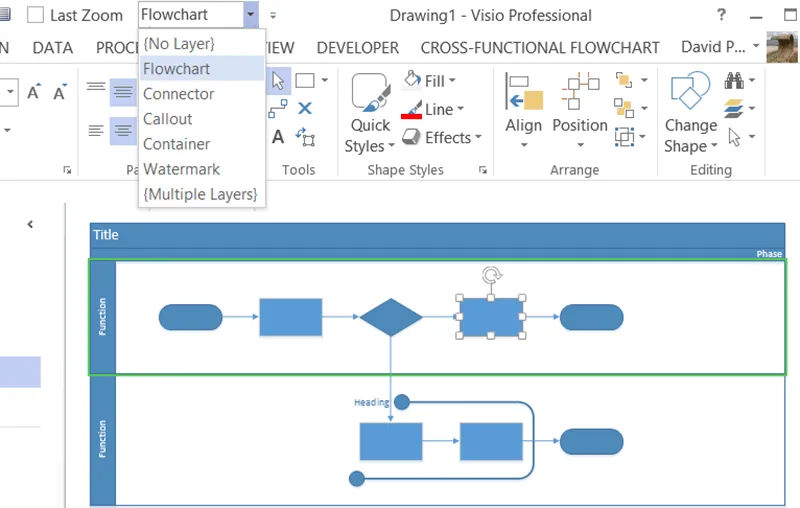
The Layer Properties dialog is opened from HOME \ Editing \ Layers dropdown list, and I can assign or un-assign layers with the Assign to Layer option on the same dropdown list.

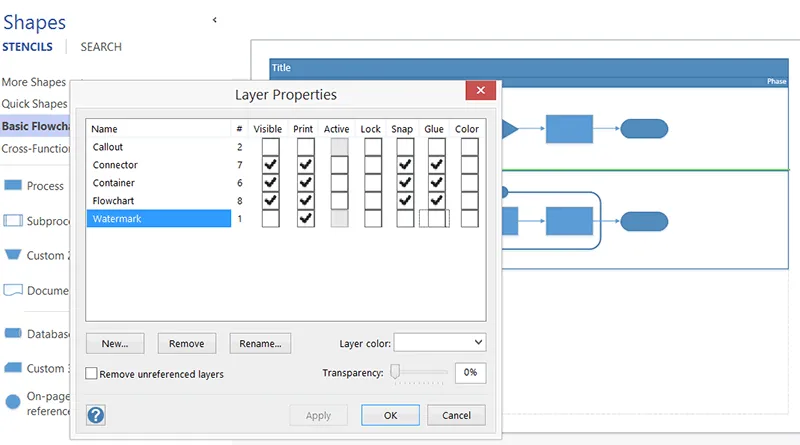
The Layer Properties Dialog
The Layer Properties dialog enables me to change a number of settings about each layer in the current Visio page.
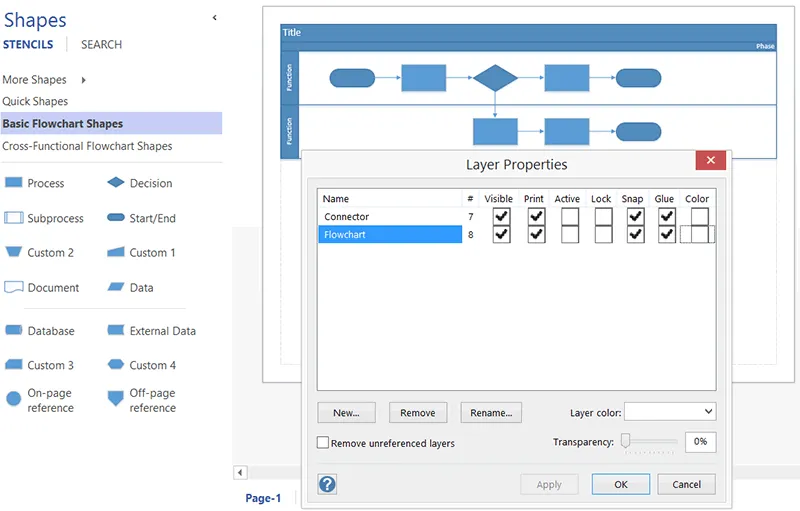
The first column displays the number of shapes on each layer, and in the above example of a cross-functional flowchart, I can count that there are indeed 7 connectors and 8 flowchart shapes. The swim-lanes and title block are not assigned to any layer by default.
However, compare that to the example below of a similar BPMN diagram. There are still 7 connectors but there are 146 shapes on the Flowchart layer! This is because each of the BPMN flowchart shapes are actually group shapes, and each sub-shape are also assigned to the Flowchart layer.
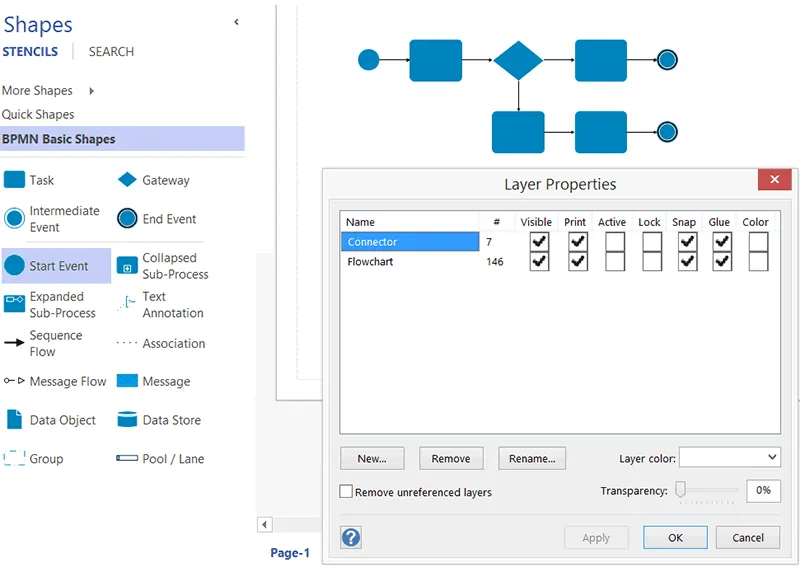
Therefore, I know that I cannot rely on the number of shapes in the first column to count the shapes on a page.
Changing the Color and Visibility of Shapes
In the following example, I have added two callout shapes and a container, but have changed the Layer color of the Connector and Flowchart layers.
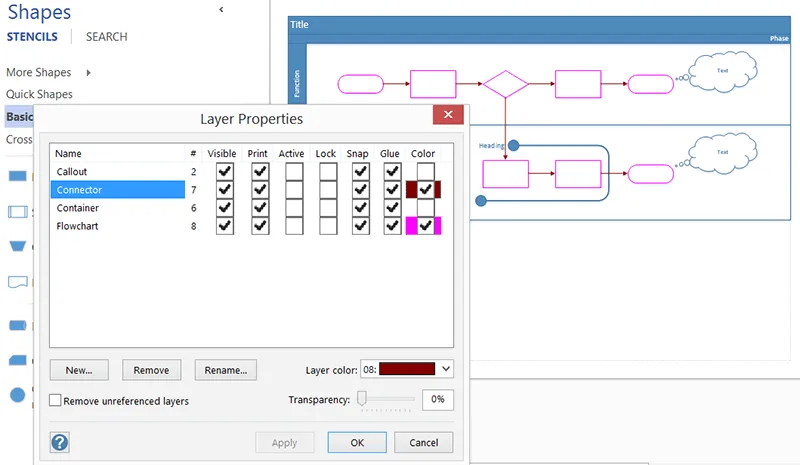
In fact, the displayed line colors have been changed to the selected color, but the fill color has been changed to white. However, the underlying shape colors have not been altered at all. This means that I can quickly revert to the original colors by removing the layer color.
Note that I also un-ticked the Snap and Glue settings because I do not want to accidentally connect other shapes to them.
Also note that the settings assigned in this dialog may not have the desired effect if shapes are assigned to multiple layers. For example, the layer color will not be assigned to shapes that are assigned to multiple layers.
Changing the Print-ability of Shapes
Not everybody views Visio diagrams online, and this introduces the risk that out-of-date documents are passed around. Therefore, in addition to ensuring that a print date/time is displayed on any prints, I sometimes add a watermark with a suitable warning such as “Uncontrolled Copy When Printed”. In the following example, I have added a block of text over the top of the other shapes, and assigned it to a new Watermark layer using the HOME \ Editing \ Layers \ Assign to Layer dialog.
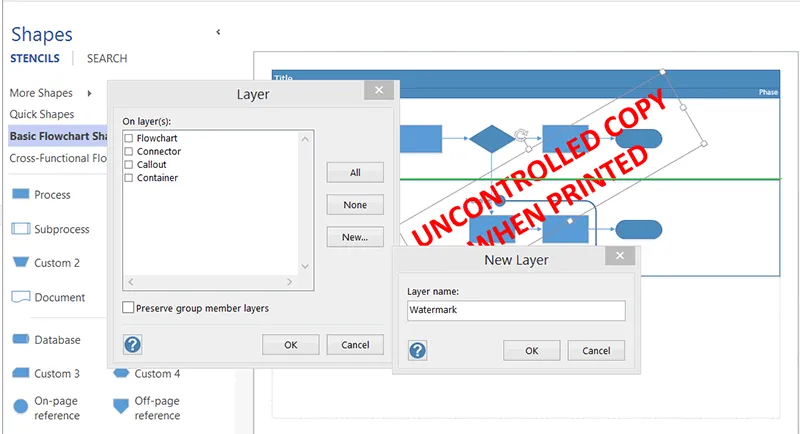
Once the shape is assigned to the Watermark layer, I then opened the Layer Properties dialog to switch off its visibility (and the Snap and Glue settings). Then, any shapes on the Watermark layer are invisible to the normal Visio user.
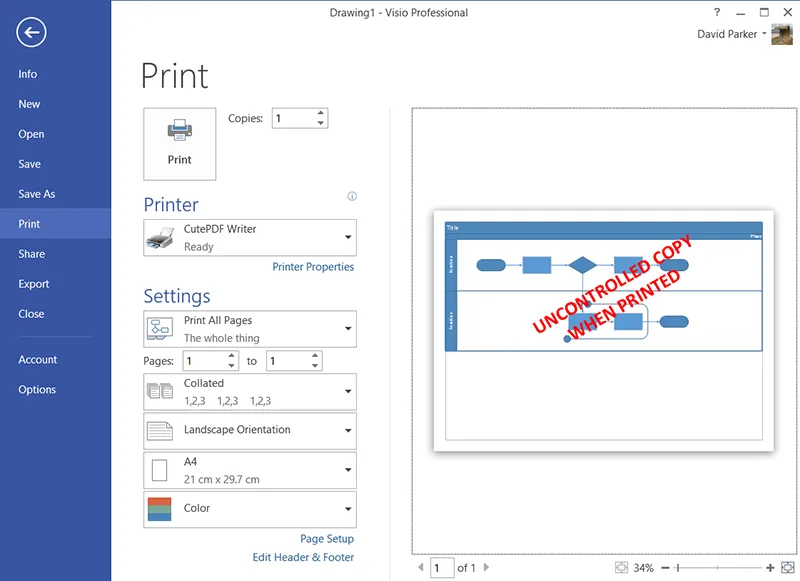
However, if someone should try to print the diagram, then the shapes on the Watermark layer are all shown and printed.
Assigning Shapes to Layers Automatically
Each layer in the Layer Properties dialog can be ticked as Active. This means that any new shape, which does not already have a layer assignment, will automatically be added to the active layer or layers.
Preventing Shapes from Being Selected
Each layer in the Layer Properties dialog can be ticked as Lock. This will prevent any shapes on these layers from being selectable in the Visio UI. This will also mean that you cannot view the Shape Data of these shapes.
Useful Command Buttons
Another way that I can make the Visio interface more useful is to add in some of the commands that are not in either the Quick Access Toolbar or the Ribbon. For example, the Layer command is a useful dropdown list to display or assign the layer of the currently selected shape. In the following screenshot, I have opened the Visio Options dialog to add this to my Quick Access Toolbar.
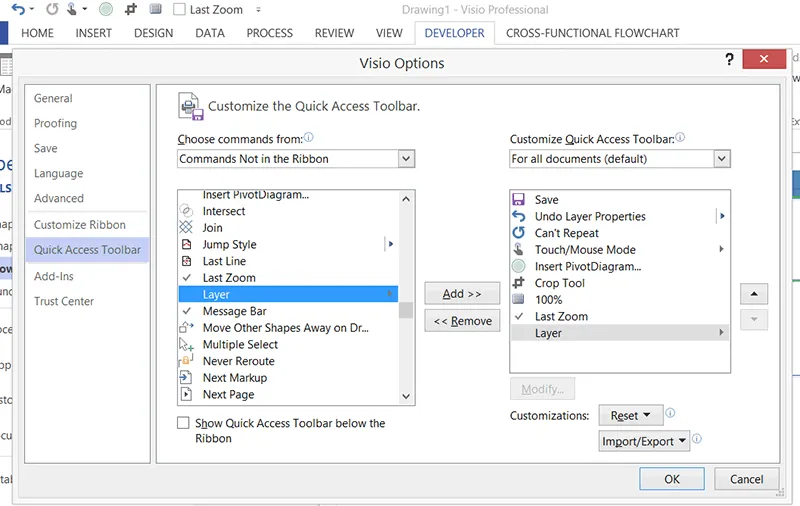
It is then available whenever any shapes are selected in Visio.
Summary
I have explained layers in Visio, and how to use them to control visibility, printability, selectability, and color. They add a richness to the Visio diagrams and enable a page to switch between subtly different content without the need to create multiple copies. To expand your ability with shapes in Visio, head to Manipulating Shapes in Visio.

.png)