Custom Shapes and Stencils
It often surprises me that Visio users do not create custom shapes more often. I am not talking about simply drawing a few rectangles or changing the fill color of existing shapes, but either amending existing master shapes or creating new master shapes. In this article, I will describe how to amend or create simple master shapes and save them in a custom stencil. It is not an in-depth tutorial on customized shapes because Visio shapes can be complex with many different capabilities and behaviours to suit their intended use.
What is a master shape?
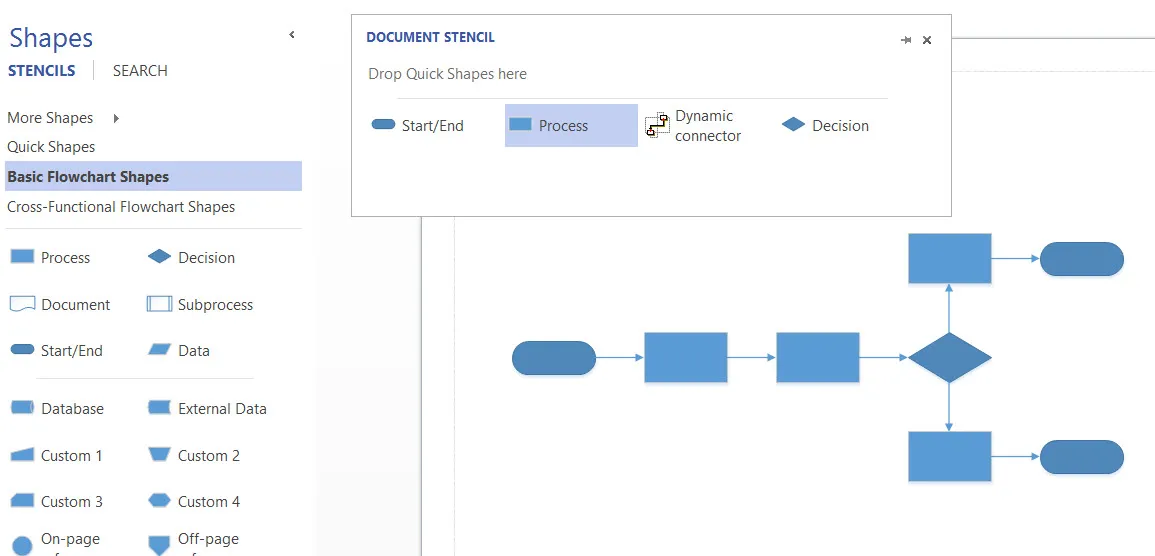
First, it is very useful to understand how master shapes work in Visio. Whenever a master shape is dragged from a stencil on a page, Visio first checks to see if the master exists in the document’s stencil. In the following screenshot, I have displayed the Document Stencil, and dragged the whole stencil window to the right. This is a new drawing from the Basic Flowchart template, so there are no masters in the Document Stencil to begin with.
In this next screenshot, I have dragged and dropped a few master shapes from the Basic Flowchart Shapes stencil, and connected them together. Since Visio automatically adds each master to the document stencil, the shapes on the page are actually instances of the masters in the Document Stencil. So, for example, there are four instance shapes of the Process master, and there are seven instance shapes of the Dynamic connector master.
Modifying an existing master
If I now open the Master Properties dialog for the Process master from the Edit Properties option on the right click mouse menu, I can see that the Match master by name on drop setting is unticked. This is usual for almost all of the stencils provided by Microsoft, however the Dynamic connector does have this setting ticked. This is because Visio created this master automatically with the arrow head on the end of the line, since this type of diagram needs it.
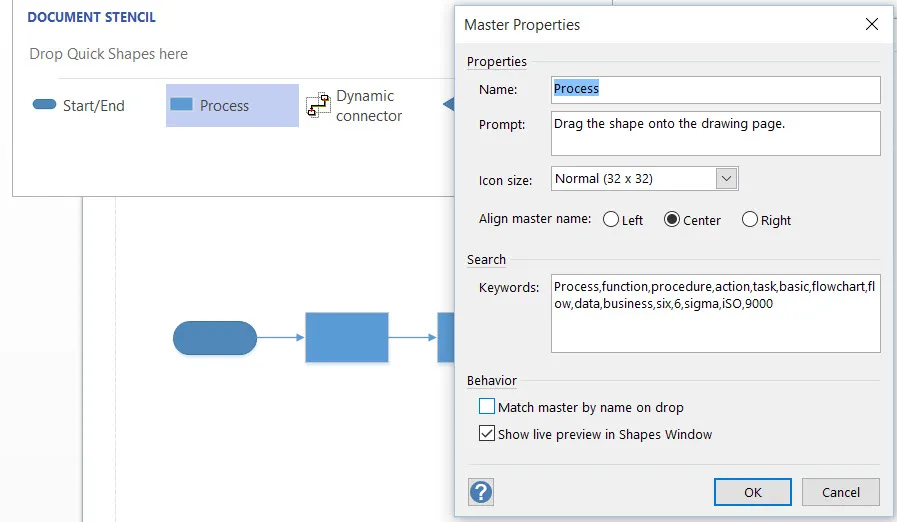
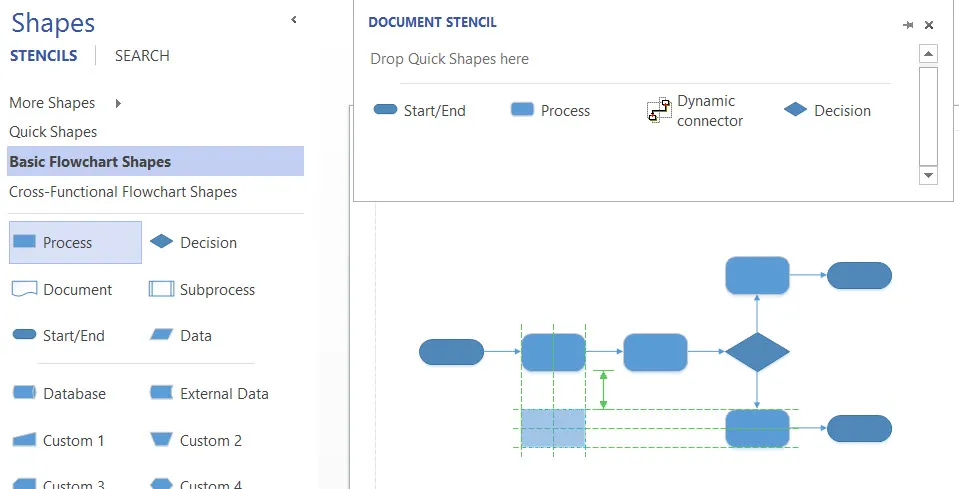
I can make some changes to the Process master shape, using the right mouse menu Edit Master / Edit Master Shape option, which will then be inherited by all existing instance shapes, and, if I tick the Match master by name on drop setting, then this Process master shape will be used from now on in this document, even if I drag and drop the Process master shape from the Basic Flowchart Shapes stencil. In the following screenshot, I have added rounding to the corners of the Process master in the Document Stencil, and then dragged and about to drop the Process master from the Basic Flowchart Shapes stencil. The image under my cursor is from the shape on the Basic Flowchart Shapes stencil, but as soon as I drop the shape it actually drops my modified Process master shape.
I could have made more graphical changes, added Shape Data rows, or added some custom behaviours.
This technique should be done with caution if your shapes are integrated with code or an application.
Creating a new master shape
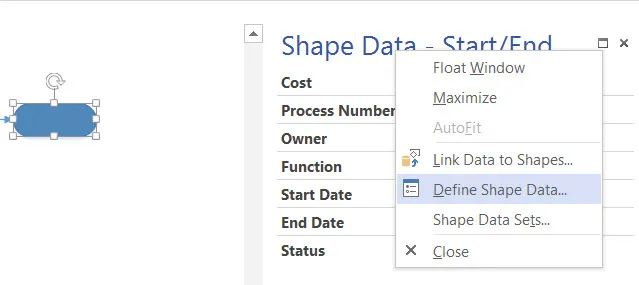
Of course, I do not always just amend existing masters, sometimes I create new ones. For example, I may want to add a new master shape, called Web Service, with the same Shape Data rows as the other flowchart shapes. I can use the Shape Data Sets… option from the right mouse menu of the Shape Data window when I have an existing shape selected.
I can use the Add… button on the Shape Data Sets window to create a new set from the selected shape.
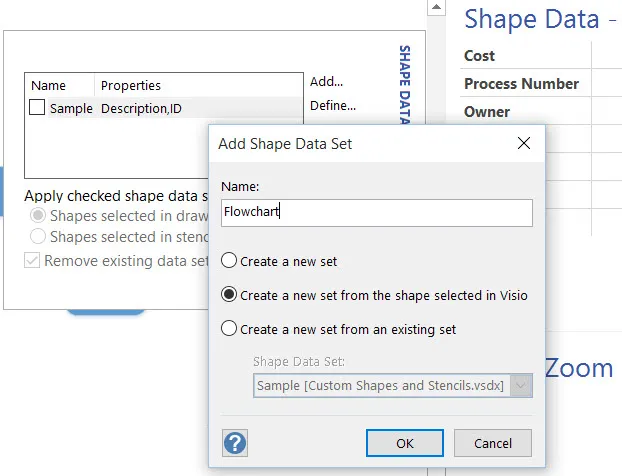
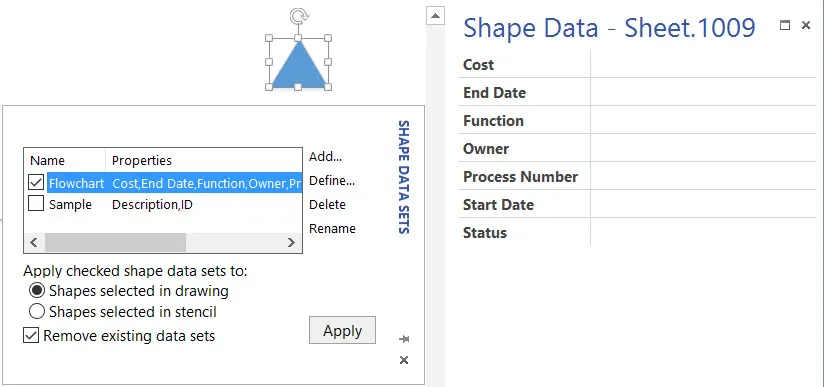
I drew a simple triangle, and copied the format from one of the existing flowchart shapes using Format Painter, and then opened the Shape Data Sets window again from the Shape Data window when I had the new triangle selected. Of course there were no Shape Data rows on it until I ticked the new Flowchart data set and pressed the Apply button to transfer the Shape Data Set to the triangle.
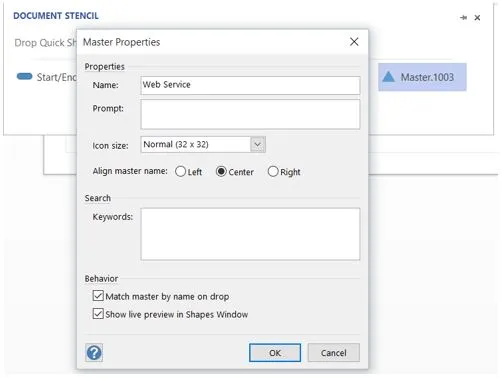
I then dragged the triangle shape onto the Document Stencil and opened the Master Properties dialog to edit its name, and other properties.
I then tested the Web Service shape by dragging it onto my page.

Saving stencils for re-use
It is good practice to test and tweak a new master in a Document Stencil before creating a new stencil, thus making it available for use in any document. In fact, the Document Stencil window is normally hidden from view because it can be confusing with all of the unsorted masters that are used in the drawing. A separate docked stencil provides simplicity because the masters are arranged in them.
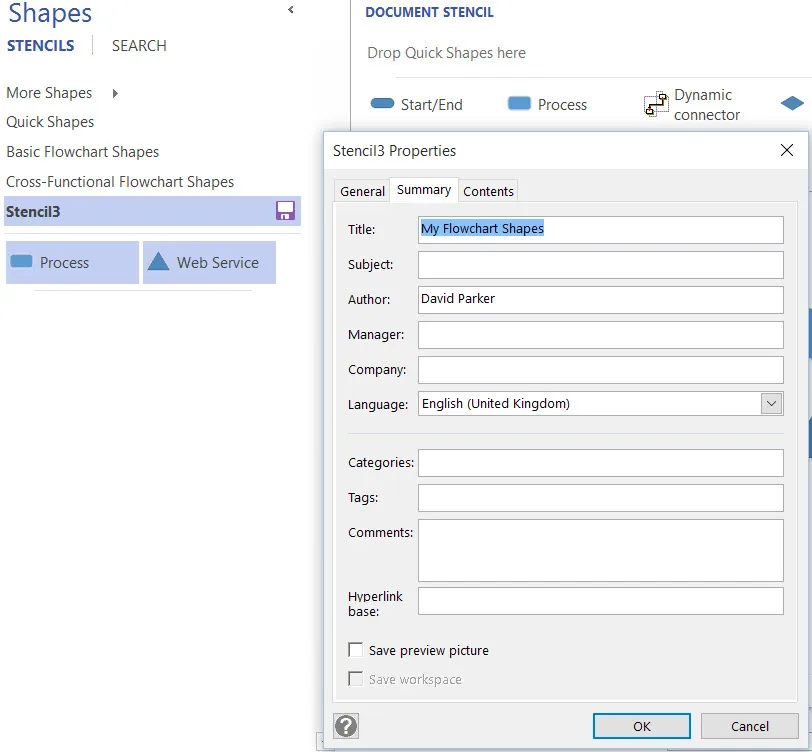
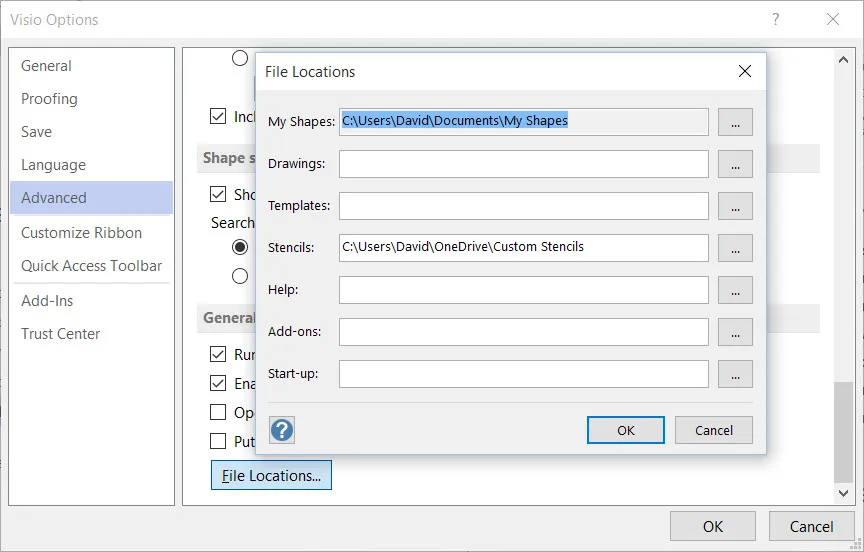
A My Shapes folder is created inside the Documents folder when Visio is installed, and this is a good place to save any custom stencils to. It is good to enter descriptive title in the Stencil Properties dialog, which can be opened from the right mouse click menu of the stencil header. This description will be displayed instead of the file name.
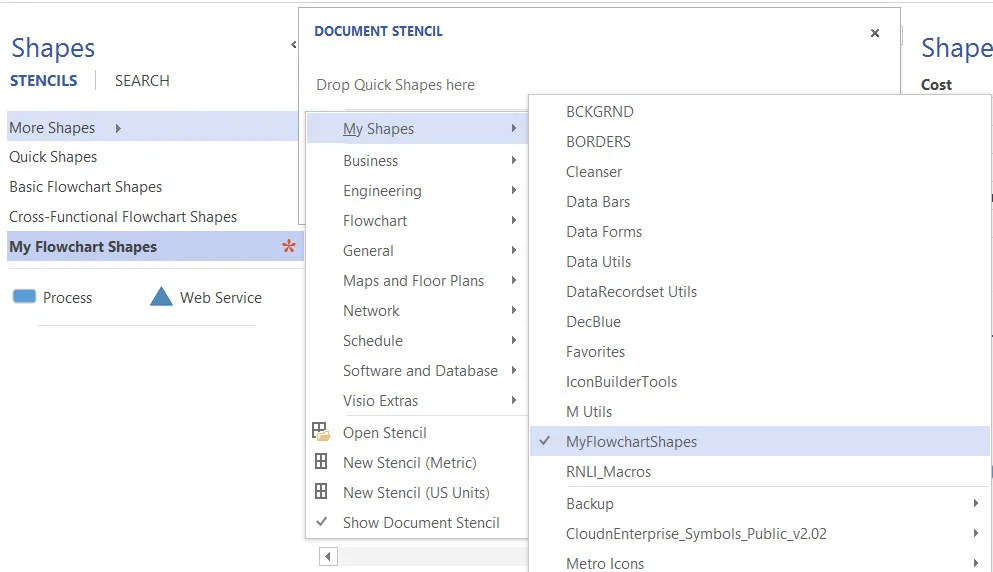
When the stencil is saved into My Shapes folder, it will become available for use in any Visio document from the More Shapes button.
Alternatively, I could set up a folder elsewhere for custom stencils and save the stencils in there. I can enter this folder in the dialog opened by the FILE \ Options \ Advanced \ File Locations button.
In fact, I create sub-folders to store the stencils in because Visio will iterate through each sub-folder and present them under More Shapes as category names with the stencils inside them. This is also true for the My Shapes folder.
Moreover, I can enter multiple folder paths separated by semi-colons for any of these file locations.
Summary
In this article, I have briefly explained how to create master shapes and stencils. I have also described how existing masters can be amended locally within the Document Stencil. The use of master shapes in Visio is the key to speed, efficiency and maintainability. To learn more about editing and manipulating shapes in Visio, head to Edit Shapes in Visio

.png)