

Shapes are central to the power of Microsoft Office's Visio, and it is often necessary to actually edit the Visio diagram by copying, moving, rotating, or re-sizing shapes. It is possible to protect Visio shapes for any or all of these edits, but if your shapes permit you to manipulate them, then this article will help you to be efficient in these actions, thus allowing you to spend more time concentrating on conveying the meaning of the diagram. This post is aimed at Visio 2013, but Office 365 users will still find useful advice.
To Copy or Duplicate shapes?
It may seem strange to start with copying, but I am aware that some Visio users are unaware of the advantages of using duplicate rather than copy and paste. Copy (CTRL+C) will put the selected shapes into the general purpose Windows clipboard, thus making them available to other applications outside of Visio, and requiring you to use Paste (CTRL+V) to drop copies of the selected shapes. Duplicate can be used to keep the selected shapes completely within the Visio application, making it more efficient, thus avoiding possible corruption from any other application. You can duplicate the selected shapes with the CTRL+D keys, or by holding down the CTRL key whilst you click and drag the shapes, as in the following screenshot. Notice that the cursor has changed to show an arrow and a plus sign.
You can duplicate between pages too, by dragging the selection over the target page tab at the bottom of the drawing window.
Moving shapes
All Visio users know that you can move shapes by selecting them and then dragging them to the desired location, but did you know that you can ensure that the selection moves horizontally or vertically simply by holding down the SHIFT key?
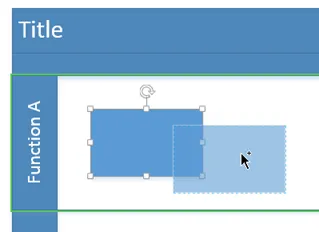
Visio 2013 will provide you with green alignment guides in most circumstances, as in this screenshot.
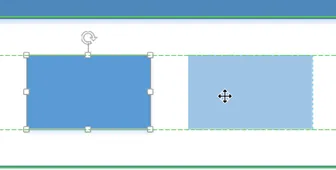
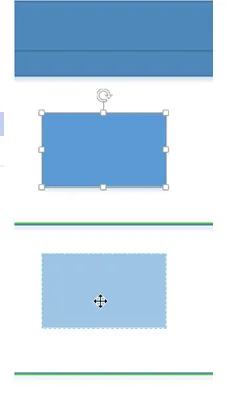
However, there are times when they will not be displayed, as in the following case where I move the shape from one swim-lane to another, therefore the ability to ensure that the shape moves exactly vertical by using the SHIFT key is very useful.
Note that you can also use the SHIFT key after applying the CTRL key for duplicating the selection.
You can use the arrow keys to move selected shapes too, and if you hold down the CTRL key at the same time, then the movement will be in smaller increments.
Also, you can use the Size and Position window, which is available from the VIEW / Show / Task Panes drop-down menu, in order to either enter in a new X or Y figure, or to enter a formula, as in the following screenshot.
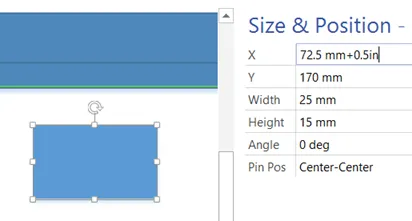
Note that I have shown that you can mix units, but do be aware that Visio will assume that you mean inches if you do not enter any units.
Rotating shapes
Most shapes, or a selection of shapes, can be rotated by clicking the rotation handle of the shape, and then holding the mouse down whilst sweeping left or right, but did you know that the offered rotation step angle varies according to the distance of your mouse cursor from the rotation pin position?
If you move your mouse pointer close to the rotation point then it will step every 15 degrees; a little further away it will step every 5 degrees; then further still it will step every 1 degree; and finally 0.1 degree if you are even further away.
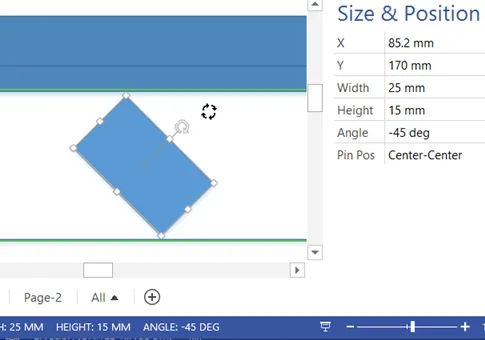
You can see the angle in the Size and Position window or in the status bar along the bottom.
You can also enter a new angle or formula in the Size and Position window, but be aware that Visio will assume you mean radians if you do not enter deg or degrees.
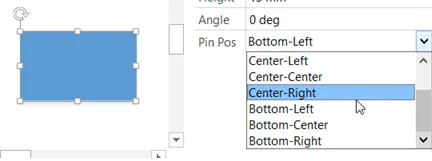
The Pin Pos is the point about which the shape or selection of shapes will rotate. This is pre-set at Center-Center for most shapes, but it can be anywhere, and the Size and Position window does provide you with some of the most common positions.
Resizing shapes
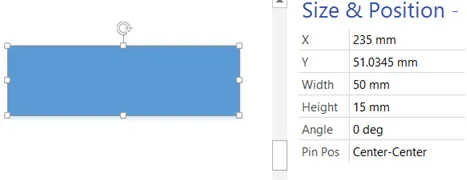
Most users know that you can resize a shape, or selection, by clicking and dragging on one of the little white square shape handles in each corner and mid-point. However, many users overlook the fact that you can use the Size & Position window to enter a formula, as in the following screenshot for the Width.

Then the formula will be applied to the shape Width.
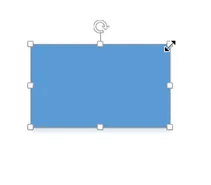
If you want to keep the shape with the same aspect ratio, then just click and drag one of the corners, without the SHIFT key held down.
Summary
This article has shown you how to edit shapes loosely or precisely. Your need to achieve this will vary depending upon the type of diagram that you are creating, but knowing how to duplicate, move, rotate or re-size shapes should speed up your diagram creation, and allow you to spend more time conveying the data more effectively, the first step to becoming a Visio professional.

.png)