
Printing in Visio
I believe that we should reduce the number of print sheets of paper in the world, and ink is so expensive, but there are times when you really do need to print a Visio document, so I am going to explore the printing options in Visio. Perhaps then, we can save a few trees and our pockets, and provide more useful printed output for others to review our diagrams.
A Visio Page or a Printer Page?
A Visio document can be comprised of many pages, and each page can be a different size; be portrait or landscape orientation; and can be set to a scale. In my example page, I am showing the first page of many A2 landscape Visio pages. In addition, they have a background page which contains the title block shape.
The FILE / Print backstage view offers me a choice of printers in a drop-down list, but I have chosen the Microsoft XPS Document Writer, which is always available on modern PCs running Microsoft Windows.
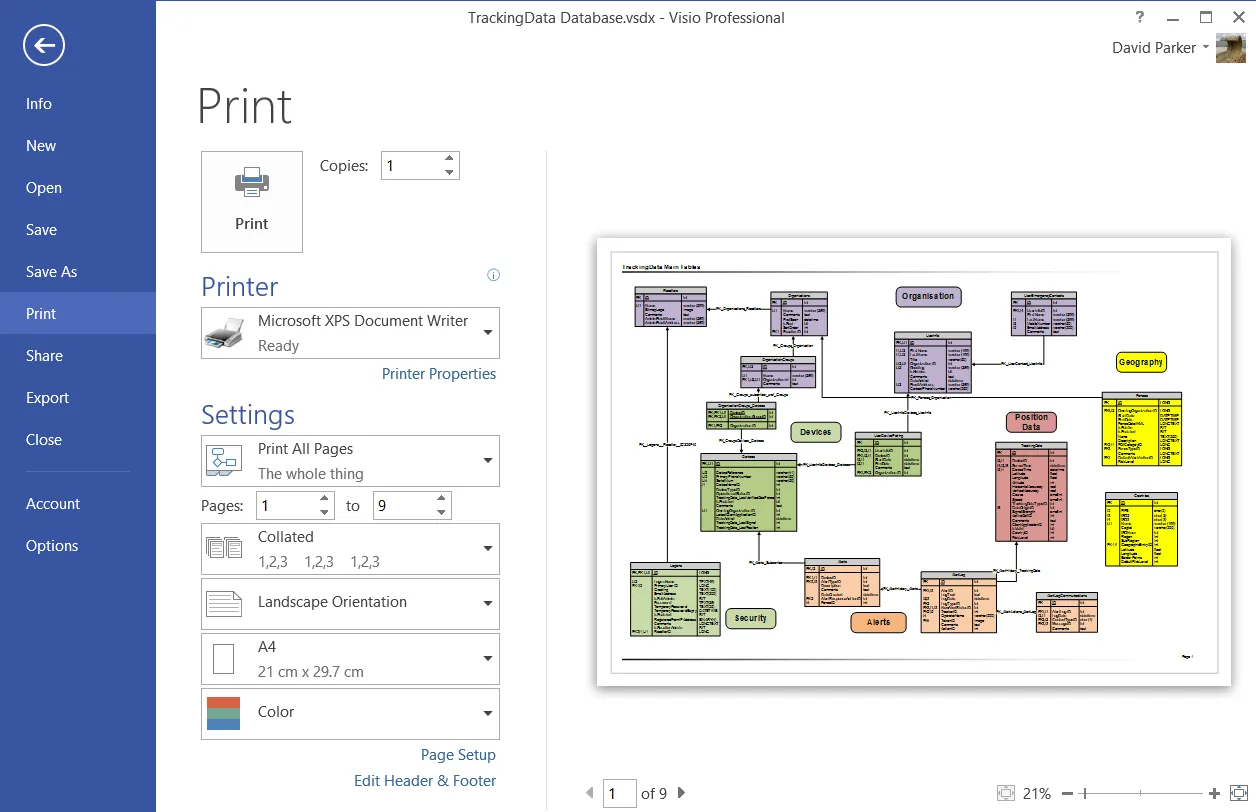
I can zoom and pan within the print preview panel, but this will not have any effect on the final print.
However, if I had zoomed into page whilst in the main drawing window before opening the FILE / Print backstage view, then I would be able to select the Current View in the Document drop-down list.
Choosing what to print
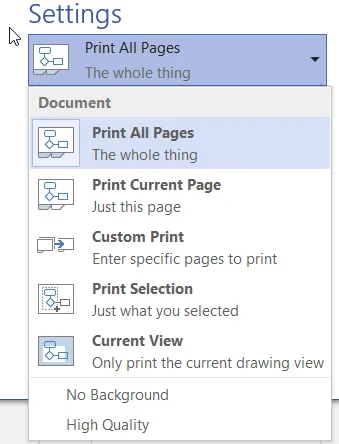
If I had some shapes selected before opening the FILE / Print backstage view, then I would be able to just print them.
I could also choose to omit the background page, which, in my case, contains my title block, and increase the graphics quality to high.
Page Setup
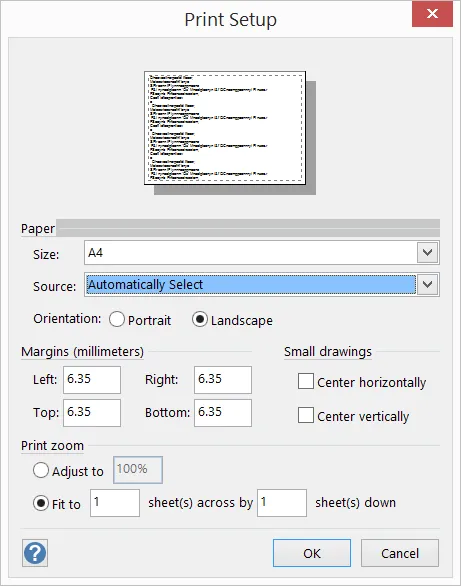
The Page Setup button opens the Page Setup dialog with the Print Setup tab selected.
On this tab, I can choose the printer paper size and the paper orientation. I can also choose whether to zoom the page to a specific percent (from the default 100%), or to print across a specified number of sheets horizontally and vertically. I could also opt to show the Visio gridlines in the print.

The panel on the right of the dialog displays the relative size and orientation of the Visio drawing page and the printer page.
The Setup… button opens another Print Setup popup dialog where I can select the paper size and orientation (again), and the print zoom (again). However, I could also set print margins and whether to center the print vertically or horizontally.
Page Size
The Page Size tab is for setting the Visio drawing page, which can be different to the printer page.
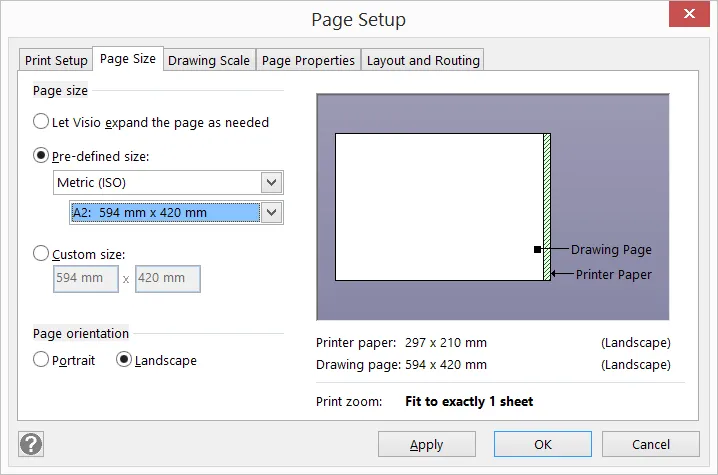
So, if I decided to print my A2 size landscape Visio page on four sheets of A4 landscape paper, then I can print my diagram at 100% zoom, and there will be an overlap in the graphics so that I can stick the paper together, just like a jigsaw.
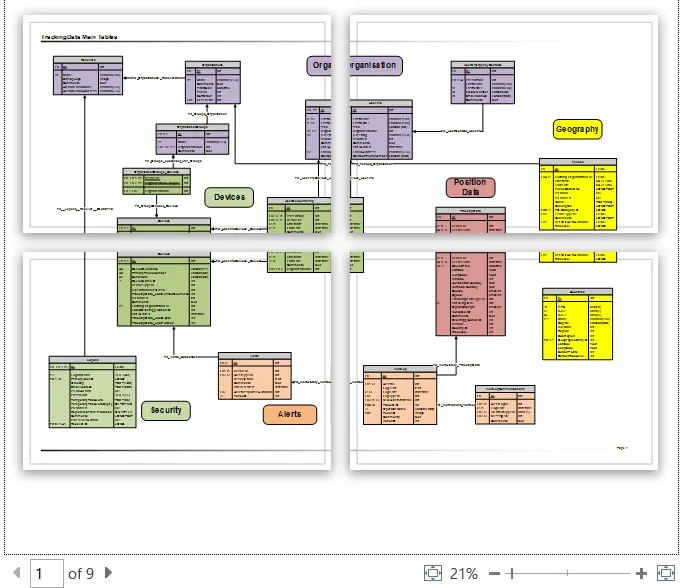
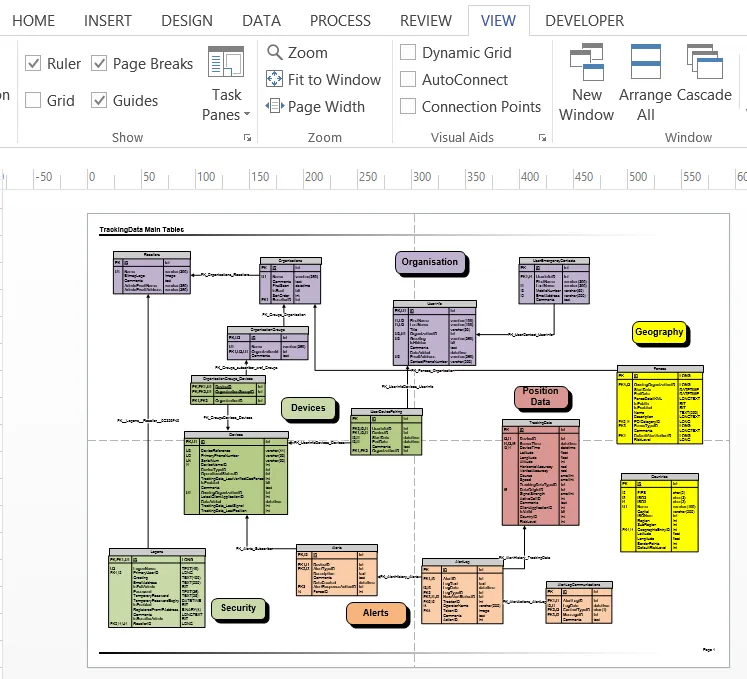
I can show where the Page Breaks are with the check box in the VIEW / Show ribbon group.
The following screenshot is of the printed oxps file viewed in Reader app. It shows that the first A2 size Visio page has been split into four A4 size printer pages, whilst the remaining eight pages in the Visio document are printed to fit the A4 printer pages. Thus there are twelve A4 paper prints created from nine Visio pages.

Header and Footer options
The Edit Header & Footer… link opens the Header and Footer dialog, which provides header and footer areas where text can be added to the printed pages. I can edit the top and bottom margin for this text, and the font that is used. I can also enter or select escape codes that will insert page, date or file name information.
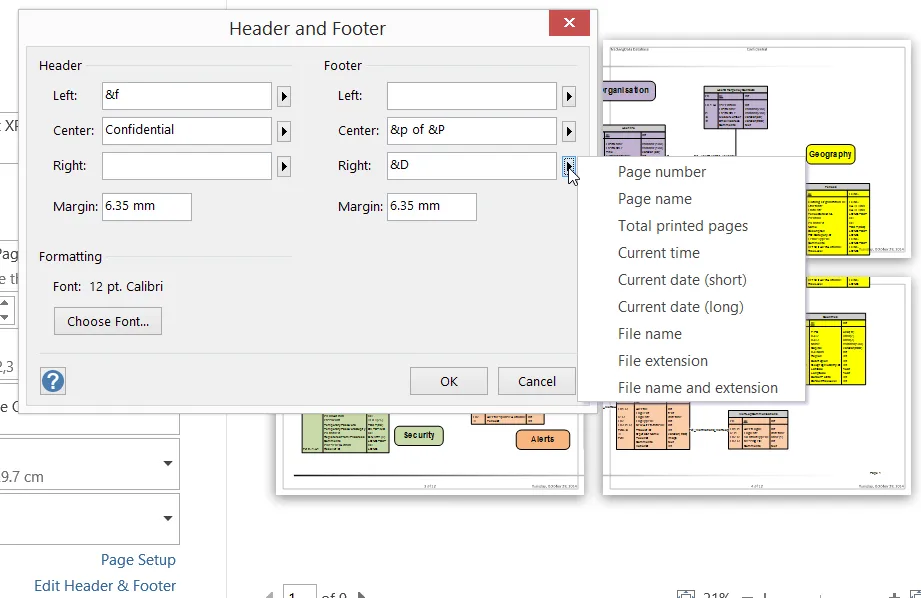
The following table lists the special escape codes that can be used within the header and footer zones.
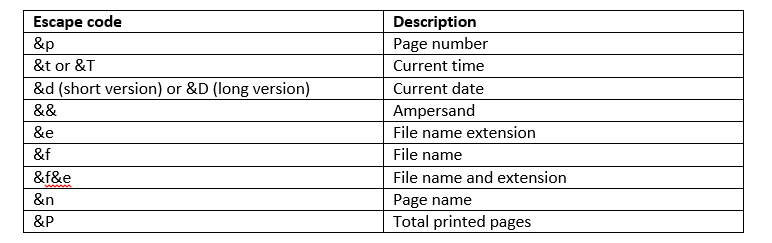
The text that I entered in the example above created the sample output below where I can see the footer of the fourth printed page and the header of the fifth one. Note that the &p escape code displays the printer page number, and the &P escape code is the total number of printed pages. This is contrast to the Page 1 text which is for the first Visio page!

It is worth knowing that the header and footer text is displayed over the top of any Visio page graphics.
Summary
In this article, I have explained the different printing options that are available, and the main take away is that any Visio page can be zoomed in or out to fit any printer paper page, or a Visio page can be split over many printer pages … and you can automatically label each of these split pages to allow for re-assembly afterwards.

.webp)